
Wednesday, April 29, 2020
My New Etsy Store
Hi guys, I've decided to open an Etsy store for the Flatlays I've been making for my author website. I'm excited to find a place to share all the flatlays I've been shooting and using. They are simple to use and can really add a polished look to your social media. If you've already purchased and are looking for instructions on how to replace the book cover image, I've posted a video below to help!
Wednesday, March 8, 2017
New Small Space series
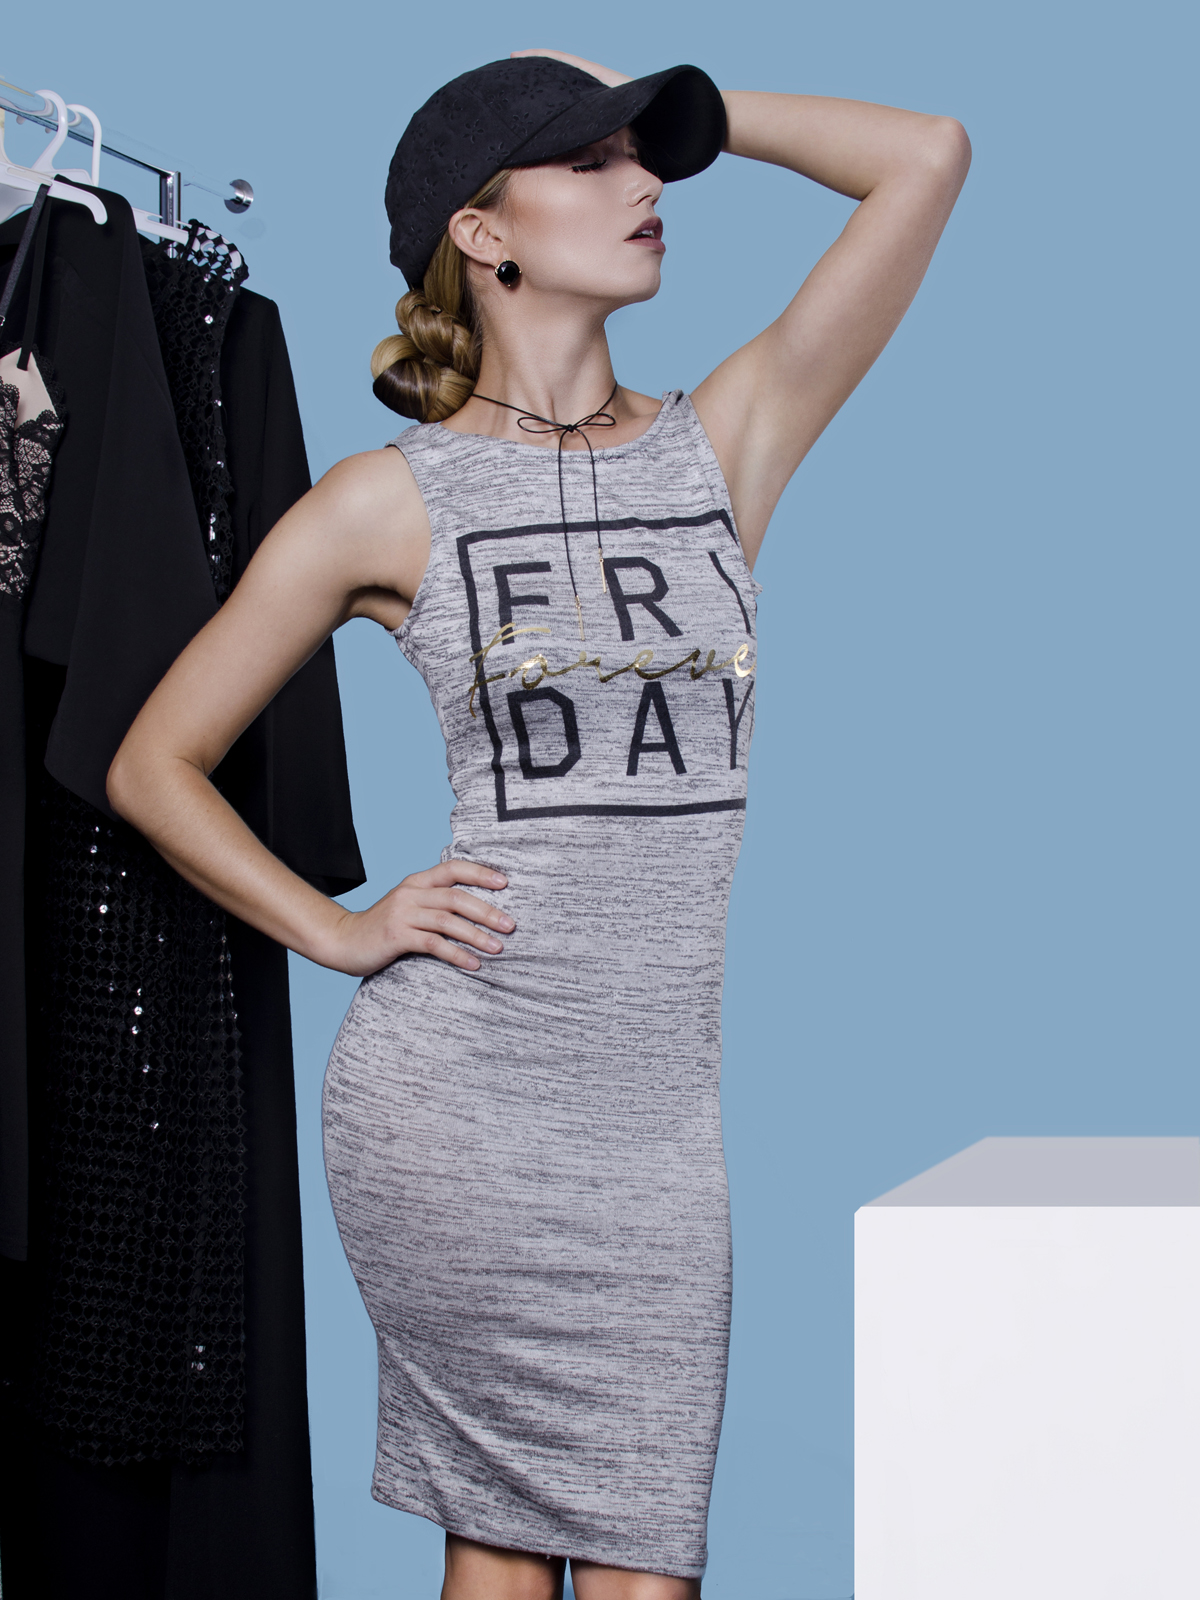
This week I'm starting a new series on shooting in small spaces. Earlier today on my Instagram (@aandersenphoto) I shared behind the scenes video of my shoot with model Skye, and makeup artist Carissa Mosley. Here is a bit of grainy cellphone footage.

I shoot with one light only for the majority of my beauty shoots. It's a 300w strobe that I keep on 1/4 power. The umbrella in the shot is a 2ft softbox umbrella. It's up 4'2" and 4'5" away from the model. The model is also 4'6" away from a black background. Noticed the light is not facing the Skye, but rather turned a little more than 45 degrees from her. This does two things, it keeps too much light from hitting the background, and also feathers the light across the model's face which gives you a more even exposure across the subject. Below is a light diagram. It's my first one, so you'll have to bear with me while I learn to use them. :)


I shoot with one light only for the majority of my beauty shoots. It's a 300w strobe that I keep on 1/4 power. The umbrella in the shot is a 2ft softbox umbrella. It's up 4'2" and 4'5" away from the model. The model is also 4'6" away from a black background. Noticed the light is not facing the Skye, but rather turned a little more than 45 degrees from her. This does two things, it keeps too much light from hitting the background, and also feathers the light across the model's face which gives you a more even exposure across the subject. Below is a light diagram. It's my first one, so you'll have to bear with me while I learn to use them. :)

Here are the before and after pictures of how the shoot came out. I put my camera settings on the picture. You can see from the before picture that the image is way underexposed. I normally underexpose my images because I really like high contrasted images. When I'm shooting inside, on a black background, I will underexpose a little more, just to deepen the background. In a small space, the other tricks to darken your background, i.e moving your subject farther from the background, or adding Vflats to block the light are not easily accomplished. My shooting space is a little over 20ft in length, so fitting my model, and everything else is a tight fit. This is one of the way's I've adapted to get the images I want with the space I have. I'm sure other photographers may have tricks that they use to accomplish the same thing.


The first step of my editing is always camera raw, and with a few clicks I was able to lighten the image and bring back her hair which was lost in the dark.
Thus concludes the first of hopefully many behind the scenes looks at my process for shooting in a small space. As always, feel free to hit me up with any questions you have.
Tuesday, March 7, 2017
Spring Awakening
Here are more images from my shoot for Obvious Magazine's Model Issue. The model was Francia Fonseca and makeup artist Tina Roberts.


Here are more from the shoot.


Wednesday, August 31, 2016
From portrait to fashion with these simple steps

This blog post is about some slight changes you can make to take your images from a 'portrait' look to a more fashion and beauty look. I'm using shots from my recent shoot with Modern Muse model Lane Griffith. I thought this would be the best shoot to illustrate the point since makeup was done by the model herself and there was no team of people behind these particular images. I'm going to go through four steps that I myself use to change up a shoot. Nothing technical has been changed in these images. They were all shot with one Neewer 300w strobe, a small 30 inch octagon umbrella softlight to the model's left and up about 6 1/2 feet. (If you watch the model's eyes, you'll notice the catch lights are all in the same position.) The only changes made will be the ones discussed. The background is just white seamless paper. Oh, and I used my 55-200 lens. (Because I'm always asked about what lenses I use.)
Crop
Let's say you've already done the shoot, and are not sure what to do with the images you have. A fast and easy fix is cropping the image. Cropping can remove distracting hair and clothes, and give you a different perspective of an image. In the example below, the first picture looks more like a school portrait. With cropping, your image is changed to a beauty portrait.

Posing
Duh, right? Making simple changes to your model's poses can change the mood of your photo. To take it a step further, sometimes changing your own position will make a world of difference. Take the pictures below. Same exact set-up, except I turned the light away from her a little.( by little, I literally only rotated the light towards her right about an inch.) This was done to feather the light across her face as opposed to having it shine directly on her face. Same hair and makeup, even same garment. For this picture, I changed my position from where I was shooting her slightly, and in my opinion it's whole different type of image. One on the left is the image after the posing and position change, and the image on the right is cropped for a tighter shot. Same picture, but two different ways you can edit it.

Hair
It's strange, at least to me, how different hair can make a person look. When I shoot a model for the first time, before the shoot is over, I almost always pull their hair back off their face. It's a dramatic difference in some photos, and you've done nothing save put a ponytail in her hair. For the pictures below, I wet Lane's hair and put three braids in it. (any one who knows me, knows I'm all about braids.) I also pulled her further from the background to darken it a little. This brought her a little closer to the light source, as you can tell by the catch lights in her eyes. So, by adding a little lip gloss and changing her hair, the image went from a portrait look, to an edgier kind of look. Her posing also has a fashion feel to it.

Add a prop
Listen, I'm telling you guys to add a, A, prop. Just one, or maybe two. Don't go slapping stuff in your photoshoots and telling people Adrienne told you to do it. I'm saying, put your model in a cowboy hat and maybe have a saddle on set. I'm not saying have her in a cowboy hat, on a bale of hay with a saddled horse and lassos hanging every where. Don't do that, that sounds not only expensive, but I can't imagine it smells great either. What I'm saying is, adding a little something to your images can make a world of difference. I am a natural hoarder, (this is not a good thing and if you tell my husband I admitted to it, I will deny until I die), so I have all manner of stuff tucked away in corners at my house. When I am coming up with concepts I regularly pull from the things I have laying around. In the below images, I re-purposed a pair of goggles my son swears he can never find when it's time to go swimming and a pair of sunglasses I found wandering around Party City. I put Lane back closer to the background and shot the images as beauty images, closely cropped from the shoulders up. I also removed the modifier from the light so that I can get a harsher 'sunlight' type of light. The light is still off to her left and about six and a half feet up. She is about four or five feet away from the light and only about a foot away from the background, if that. My living room is hella small, so she could be a little closer to the background. As you can see the addition of the goggles and sunglasses gave the images a fun and funky mood.


Monday, August 22, 2016
Batteling the bulge using frequency separation
Hi guys, this isn't a super long post at all. I was going through and editing images from a commercial shoot and a blog post idea came to me. Nothing particularly complicated or even awe-inspiring, just an easy fix for a problem a lot of us as photographers have. Unsightly bulges is what I'm talking about. I mean, real talk, unless you're photographing food or just flowers, you're running into this problem. The hardest bulges to edit are the ones forward facing, am I right? Any one can liquefy a belly, or tuck in arms and legs when it's from the side. But when a client is front facing, getting rid of a bulge is a little trickier. The bulge is caused by the difference between the lit and shadowed areas. The stomach protrudes so it catches the light and cast the area under it in shadow. By removing that shadow, you, in essence, 'remove' the bulge.

Recently, I've been working with frequency separation, and as with everything, the more I use it, the better I get at it. There are mucho articles and videos on the best way to use frequency separation. It's very useful and I've found it reduces the time it takes me to edit, as well as the number of layers I use to edit. This post isn't about how to do it, as I've said it's been covered ad nauseam. I will link you to the tutorial that finally convinced me to give it a try, because prior to this guy, it seemed like way too much work to me. You can find a tutorial as well as an easy action you can download to save yourself some time on FX-Ray,'s website.
In the action it's separated into low frequency which I use to edit color differences and high frequency which I use to edit detail, like skin, blemishes, wrinkles and such. The layer we are working with is the low frequency as in the pic below.

Once you're on the low frequency layer, go to your paint brush layer and select the mixer brush tool.

Below is a pic of the settings I use for my brush.

To use the brush, select the color area to sample. The shadowed area is what you want to get rid of, so select the area above it to sample. As with everything, be careful of your sampling areas because you want to make sure the area you paint matches the area around it. In the below example, I haven't done anything to the picture save brushed away the shadow on her lower stomach. Getting rid of that dark area 'flattens' out the small bulge that was there and now her stomach appears flat. The same thing can be accomplished using the healing brush, but when you're working with textured garments too much healing removes that texture. That's the biggest benefit I've found with using frequency separation, not having to sacrifice texture.

Another example. Nothing has been done to the image save removing the shadows on the stomach area. As you can see, the bulge is noticeably smaller in the pic on the left.

A super fast fix for a problem that plagues the lot of us. As with everything, personal preference changes with every person and this doesn't work on everything. I have found it useful, and it works for me. Hopefully you get some use out of it. Feel free to leave me questions in the comments.
Thursday, August 18, 2016
Shop TRob lookbook
A while ago I got the opportunity to do a lookbook for a new boutique opened by my friend and makeup artist Tina Roberts. I loved these images, and the looks. Here are some of my favorite images from that shoot. Model is Monique Bringham from Modern Muse Models.


Tuesday, August 16, 2016
Beauty shoot with Monique
I love hair photoshoots. It's fun trying to figure out ways to make the hair move, and though hard work to edit, I still enjoy it. Ever since I met Monique and started working with her, I knew eventually I would try and tackle the mass amounts of awesome hair she has. It was a challenge moving her hair, as it was heavy and long. Thanks for putting up with me and our many takes MOnique. :) Makeup was done by one of my fav makeup artists, Sherry Restifo. Here are a few of my fav shots from the shoot.


Subscribe to:
Posts (Atom)