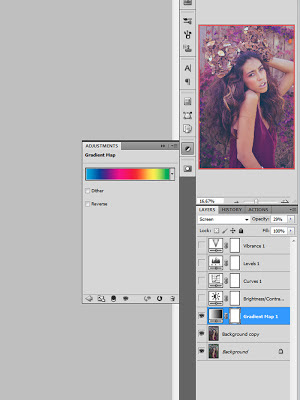
Anywho, in this post I wanted to show you how to change your images using the color range in Photoshop. So we'll start out with this image of Ariana. A most awesome model, who by the way did this entire shoot with a cast on her right hand. :) For this shoot I wanted something ethereal and whimsical, and...it needed to be done at my house. Everyone who has been to my house knows, there is no flower that is not artificial in my yard or my house. lol To pull off ethereal and whimsical was going to be a tall order. Lucky for me, my next door neighbor is one of those gardeners who couldn't care less whether or not their lovely pet project of the month is spilling on to your side of the yard or not. In this case, she had a vine with a mind of its own. Unfortunately it was not a flowering vine. But beggars can't be choosers. What was my point again? Oh...yeah...color range. So, I knew going into this shoot that anything whimsical would have to be added during the post process. There's not really a way for me to add flowers into the image without it looking fake (at least not with my current skill level) so I decided to go with changing the color cast of the image and vines. The other point of this is to also showcase how one or two tweaks in Photoshop can really change an image. By no means is Photoshop a shortcut for good photography, but, it can certainly add extra oomph to an image. So here goes my second attempt at a helpful tutorial:
Here is the before image. No editing done yet.
 |
| Note:when you are choosing multiple colors make sure the plus symbol is chosen, this will allow you to add to the selection. |

Here is a side by side of what the pics look like after just two easy adjustments.
And this is what the final edit looks like after a few more edits.
I also wanted to show another example of how I used color range to change an image. I started by first cropping the image to bring the focus closer to the subject, and to take away more of the busy background.
Here is the before and after of that image. I changed the color of the flowers using color range.
 |
| Model Julia, MUA: AnaMary Valdes |


No comments:
Post a Comment